
How to
Root Oneplus 6 & 6T running OxygenOS 11.1.2.2 – Step by Step Guide

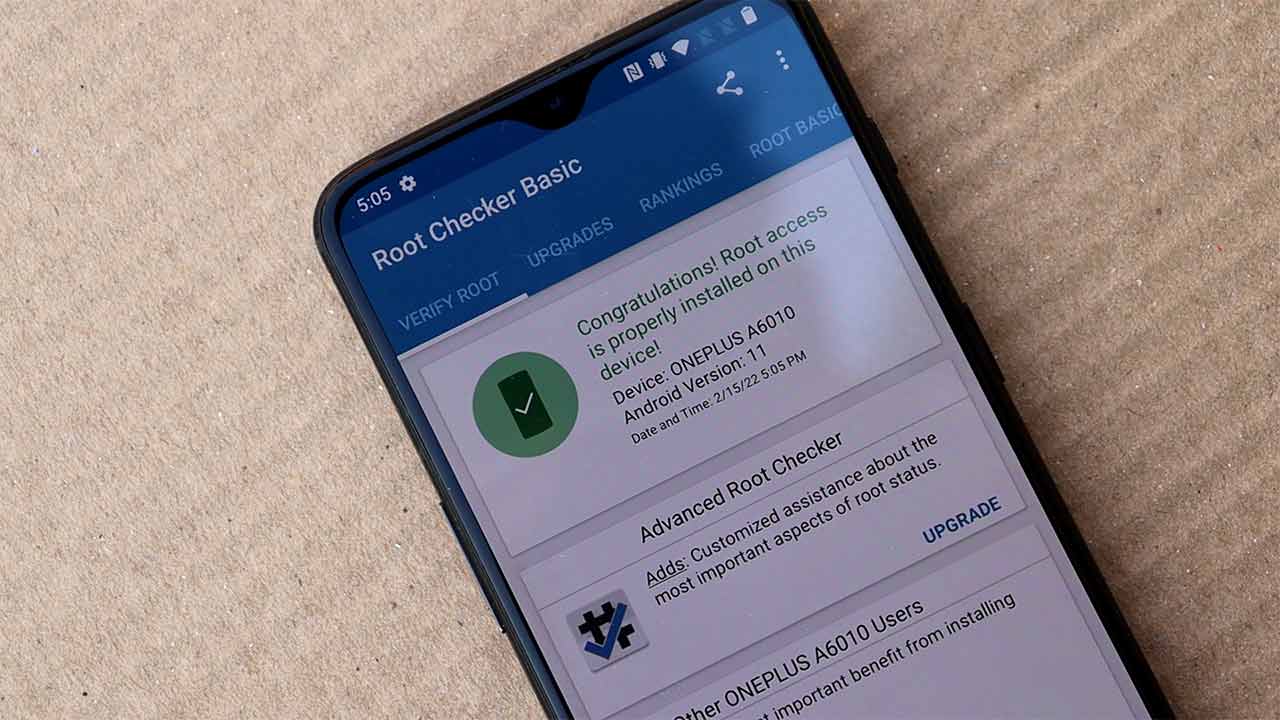
Rooting is the process of allowing users of smartphones, tablets, and other devices running the Android mobile operating system to attain privileged control (known as root access) over various Android subsystems. Oneplus have great support for custom Rom’s and now Oneplus 6 & 6T are considered under End of Life (EOL) now only one way to try out the latest android operating system is to install custom Roms. Rooting has become difficult but anyone can root Oneplus 6 and 6T with the help of the below guide. Oneplus 6 & 6T won’t receive any more official updates from Oneplus. Oneplus 6 & 6T last OxygenOS version is OxygenOS 11.1.2.2.
Prerequisite :
- A Windows PC.
- Properly Installed Adb/fastboot drivers: Follow this guide
- TWRP Recovery zip & Image File for Oneplus 6 & 6T: Download
- Oneplus 6 or 6T Device Running Android 11.
- Magisk XDA : Download/ Direct link of Magisk 24.1 (always use latest version)
Steps to Root Oneplus 6 & 6T running OxygenOS 11.1.2.2
1. Once all the files are downloaded we need to make a few changes in Device settings Enable Developer settings from about section SETTINGS – ABOUT PHONE – TAP BUILD NUMBER 7 TIMES UNTIL YOU SEE A POP OF DEVELOPER OPTION AFTER THAT GO BACK TO SETTINGS – SYSTEM – DEVELOPER OPTIONS – ENABLE OEM UNLOCK – ADVANCE REBOOT – USB DEBUGGING.
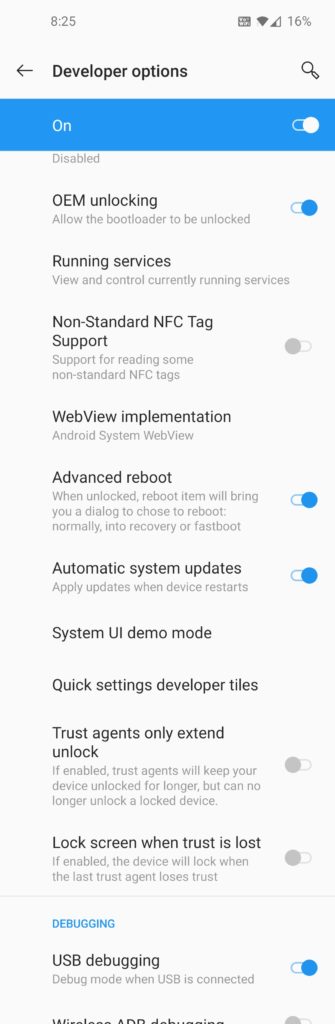
2. Later Install ADB DRIVERS, After Installing a new folder will be created in C: Drive.
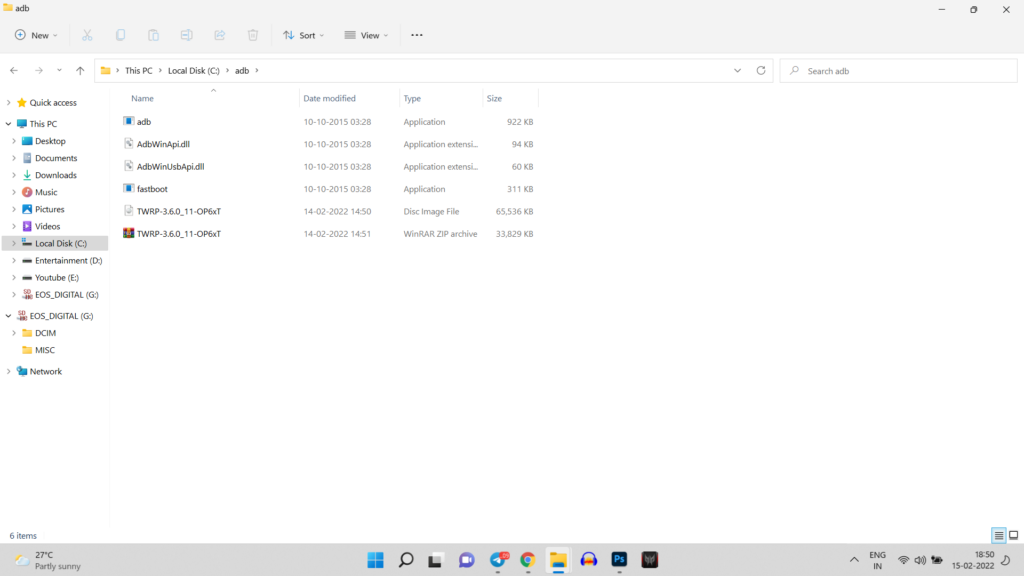
3. Now place the downloaded files (TWRP image) file in ADB folder.
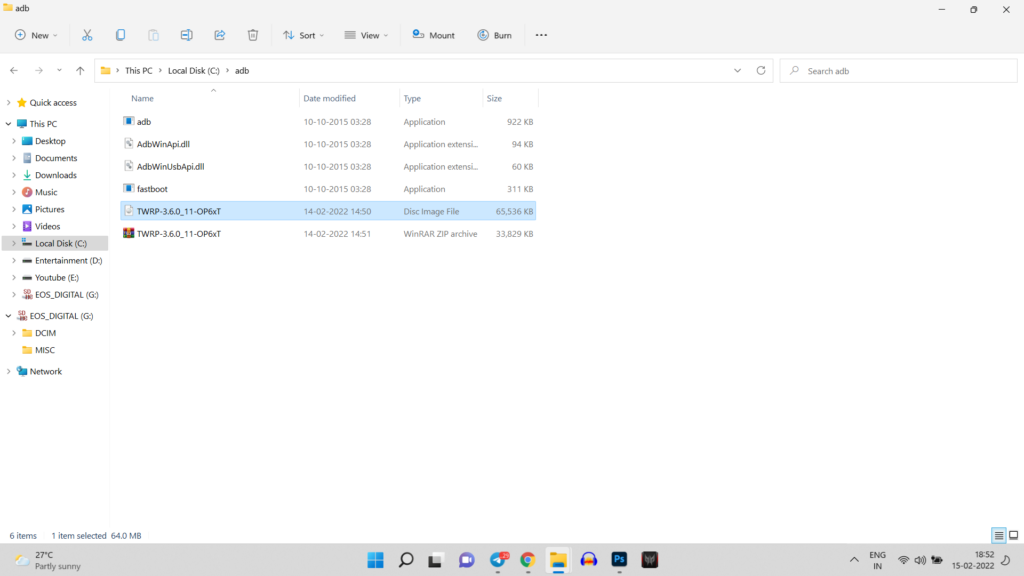
4. After this connect device to the PC & open the command prompt in ADB folder by typing CMD in the address bar & Hit Enter.
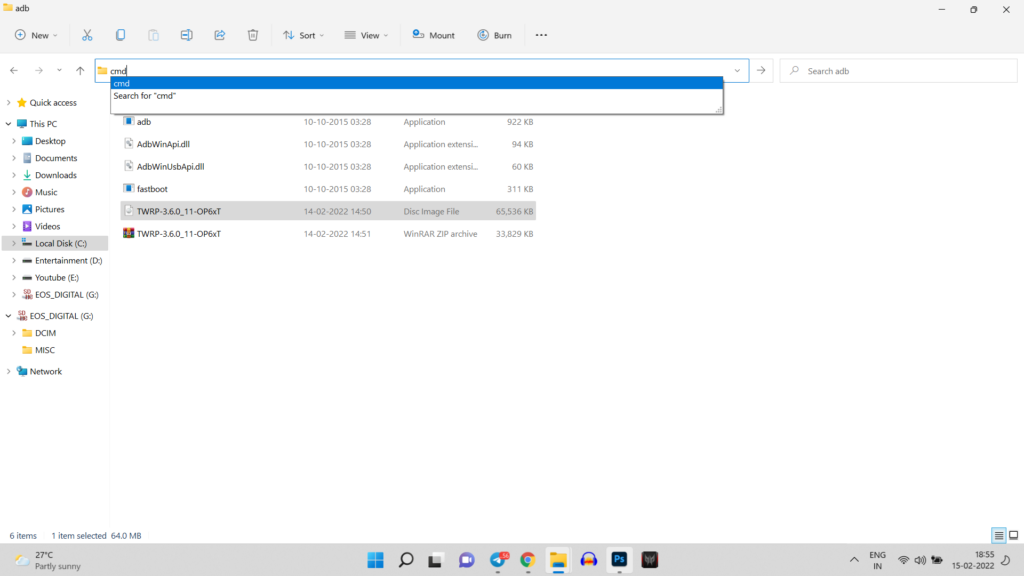
5. Now Command prompt will pop up.
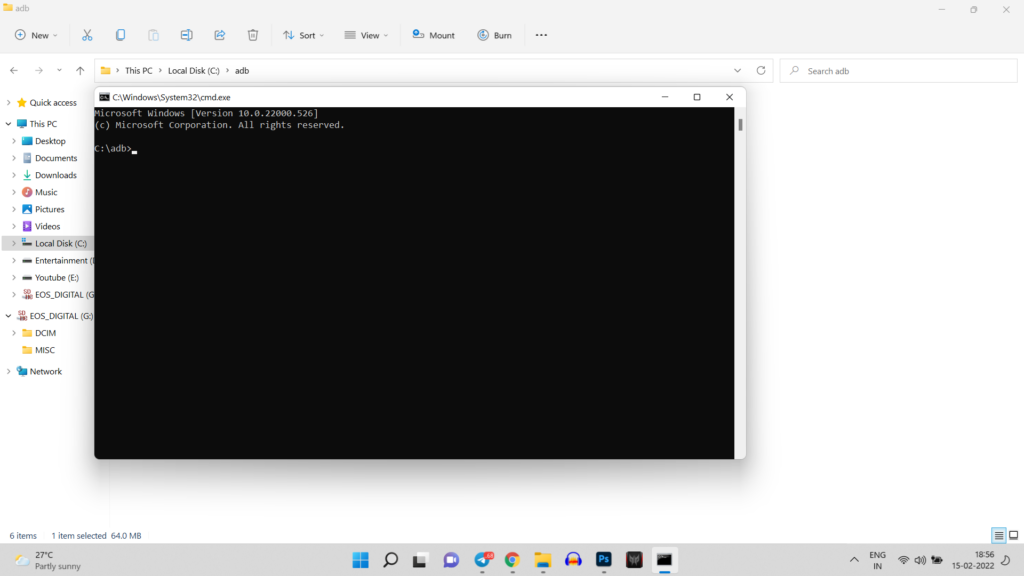
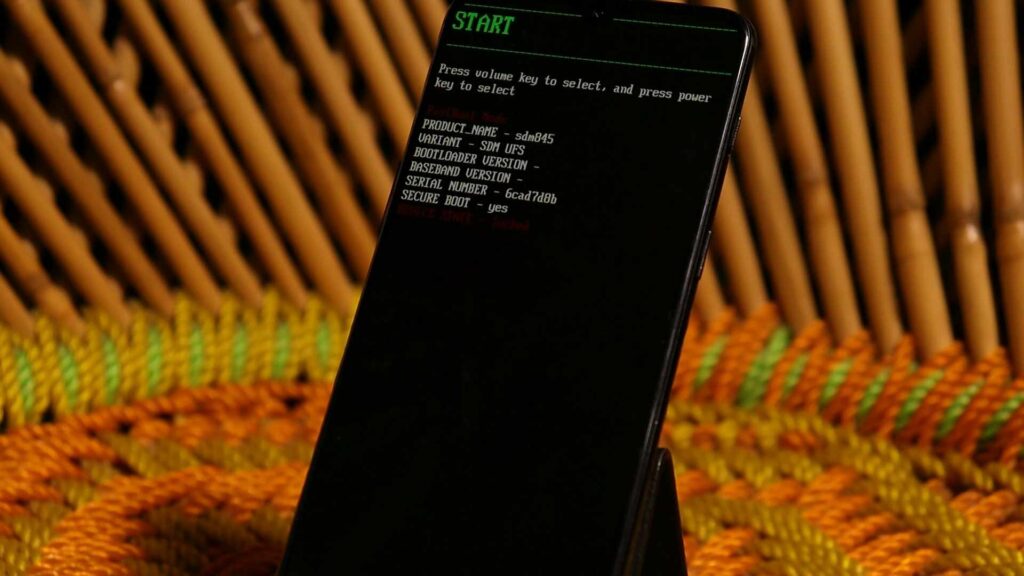
6. Time to Unlock Bootloader for that Boot device into fastboot mode by using the power button.
7. Now Device should boot into fastboot mode & Connect the device to the PC.
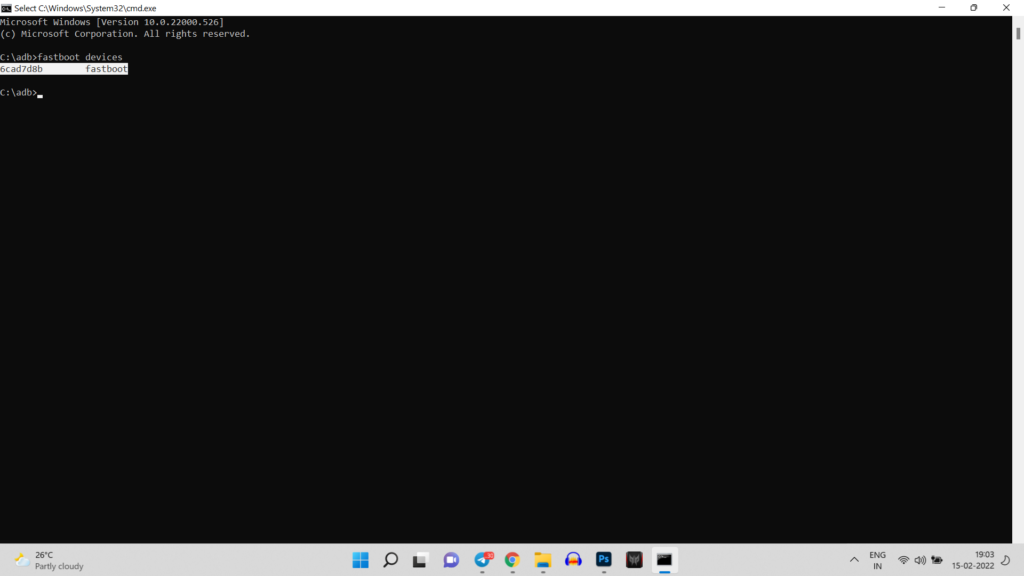
8. After that check if the device is properly connected in fastboot mode by using Command ( Fastboot Devices ) in Command prompt. If you see the serial number then the device is properly connected into fastboot Mode.
9. Now Unlock the Bootloader by using the command ( Fastboot OEM Unlock ). If you don’t get any error then the command is proper.
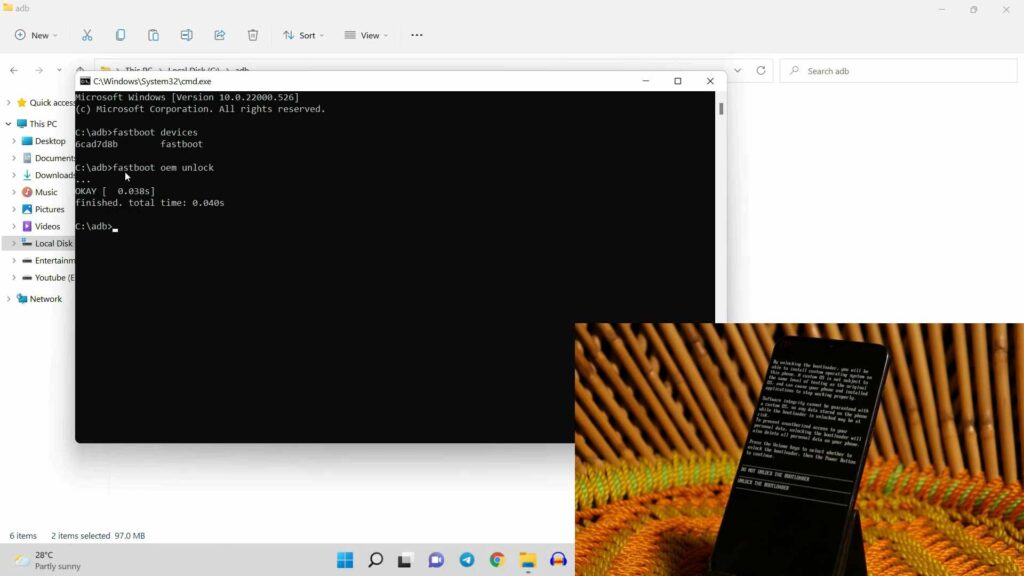
10. After the command will get a Warning message on the Device asking us to Choose the option of unlocking the bootloader, use the volume key to select unlock the bootloader. Selecting Unlocking Bootloader will wipe device data and let the device reboot after reboot complete initial setup and enable these settings again. SETTINGS – ABOUT PHONE – TAP BUILD NUMBER 7 TIMES UNTIL YOU SEE A POP OF DEVELOPER OPTION AFTER THAT GO BACK TO SETTINGS – SYSTEM – DEVELOPER OPTIONS – ADVANCE REBOOT – USB DEBUGGING.
11. Now again boot device in fastboot mode to flash TWRP, After device boots into fastboot Mode now give the command to boot recovery command is – fastboot boot (Recovery name ).img for Eg: (fastboot boot twrpxx.img) & if no Error then the device will boot into TWRP.
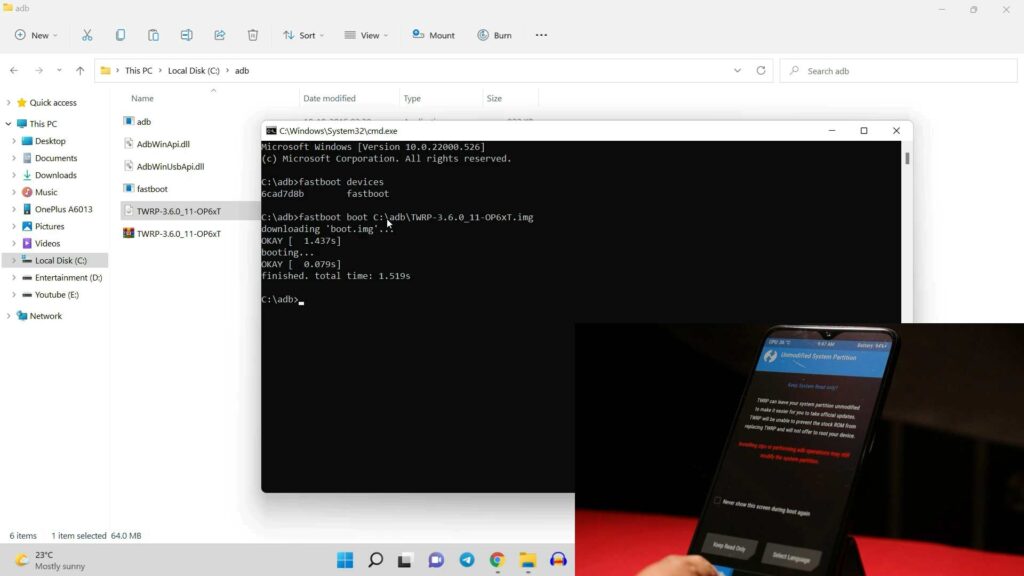
12. Now transfer all the Downloaded Files inside internal Storage (Twrp zip & Magisk).
13. After that flash Twrp Zip for Once reboot recovery.
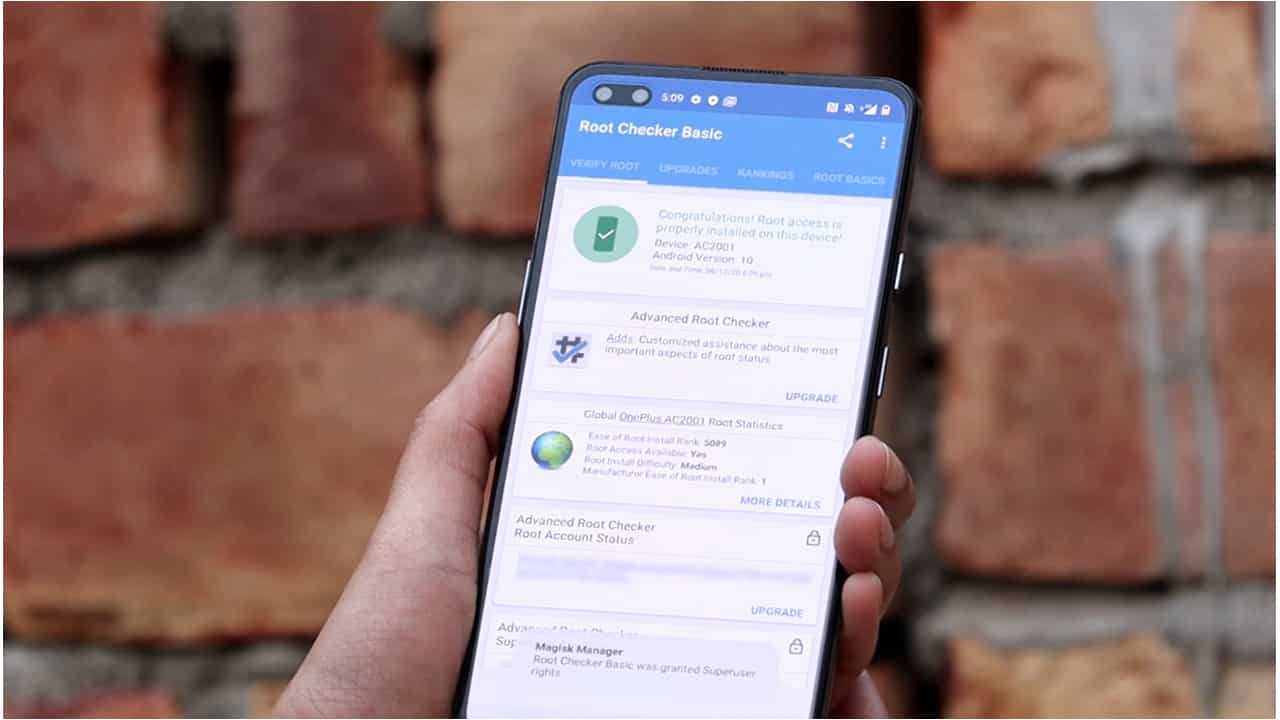
14. After booting recovery flash magisk & reboot device & Enjoy Rooted Oneplus 6 or 6T.
For better understanding watch the below guide of Rooting Oneplus 6 & 6T
Also read: Oneplus 9RT get OxygenOS 11.3 A.04 update w/ fixes of Screen & Flickering during Calls
For More Such Updates Follow Us On – Telegram, Twitter, Google News, WhatsApp and Facebook



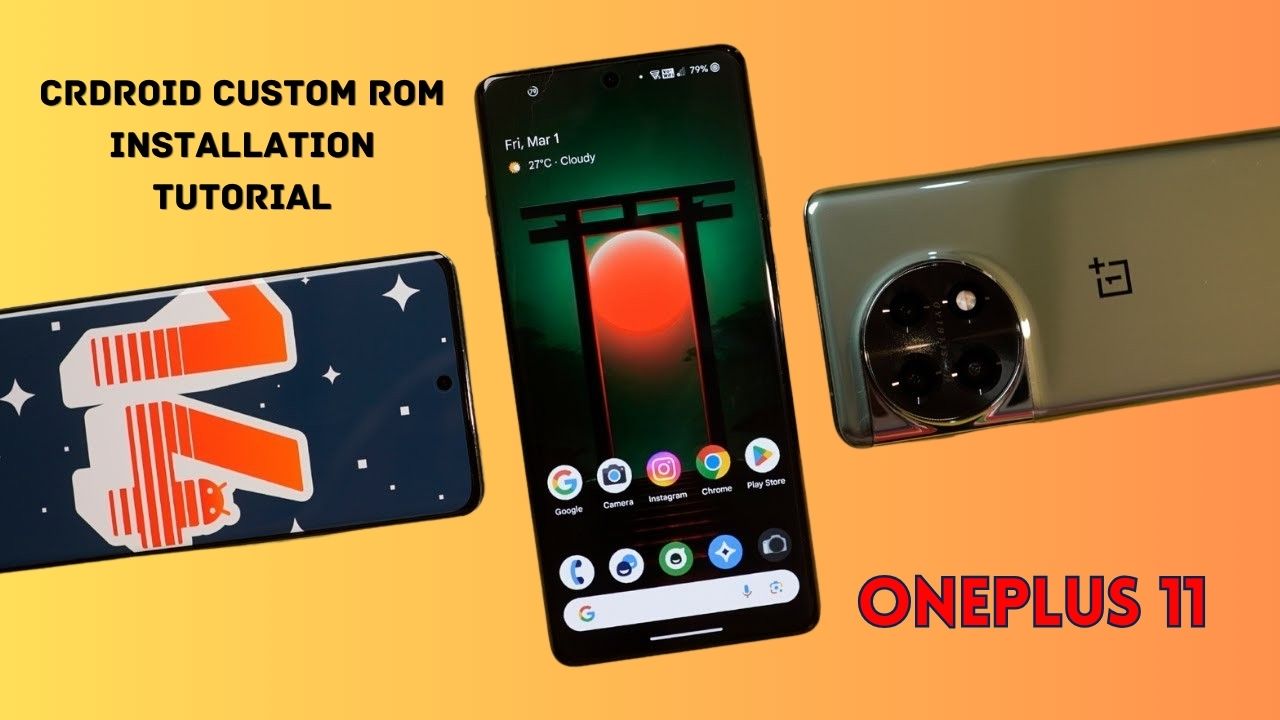
Yesterday, we posted a review video of crDroid Custom ROM on our YouTube Channel. After that, some users asked us for the installation post for that. So, here we come with a post in which we will tell you how you can install Custom ROM on OnePlus 11. You can also follow this post, even if you are installing Custom ROM for the first time as this is an easy and step-by-step guide. In this, we are particularly talking about the crDroid ROM for OnePlus 11.
Prerequisite:
- First, you have to unlock the Bootloader of your phone. So, for that, you have to Download the files that are listed below:
- Note: If you unlock your bootloader, then all your data will be wiped. So, make sure to take the entire backup of your phone.
- OnePlus USB Drivers: Download from Telegram // Mega
- ADB + Platform Tools Folder: Telegram
- OrangeFox Recovery OnePlus 11: Download
- crDroid 10 Custom ROM OnePlus 11 (A14): Download (copy this file in your P.C.)
- Install all these three one by one.
- After installing, you have to enable developer options on your phone.
- To enable developer options, you have to click on Build Number 7 times. (Settings > About Device > Version).
- After that, you have to go back and click on Additional Settings > Developer Options.
- In Developer Options, you have to enable OEM Unlocking and USB Debugging.
- Then, you have to follow this video or this post to properly install ADB and Fastboot Drivers.
- Then, you have to install OnePlus Drivers.
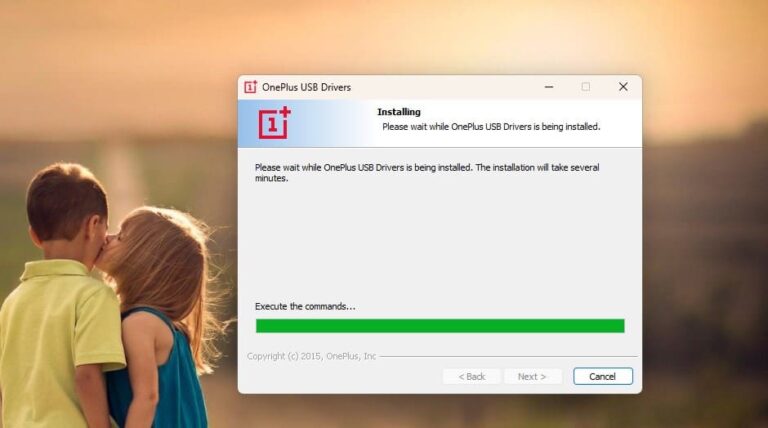
- After installing ADB and Fastboot Drivers, you have to open the Platform Tools folder.
- In this folder, you have to open the terminal or command prompt by typing cmd in the Address Bar and hit enter.
- Then, connect your phone to your PC.
- After that type adb devices Command Prompt or Terminal and hit enter.
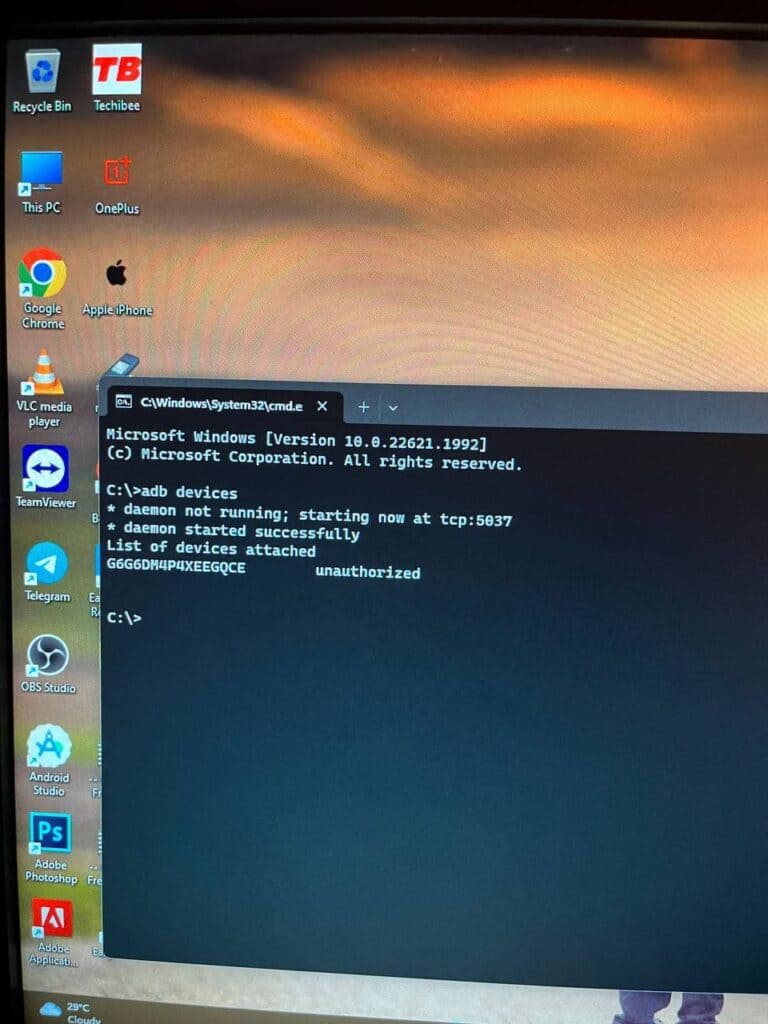
- As you type this command on your PC. You will get a pop-up on your phone. You have to click on allow as shown in the image listed below:
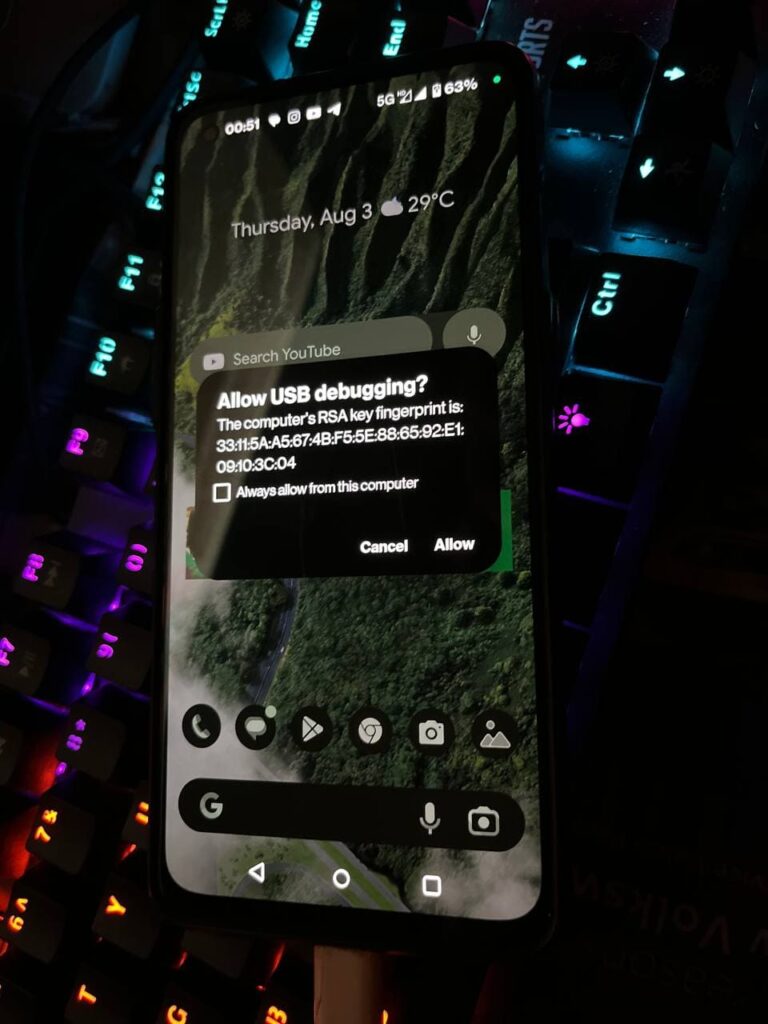
- Then, type adb reboot bootloader.
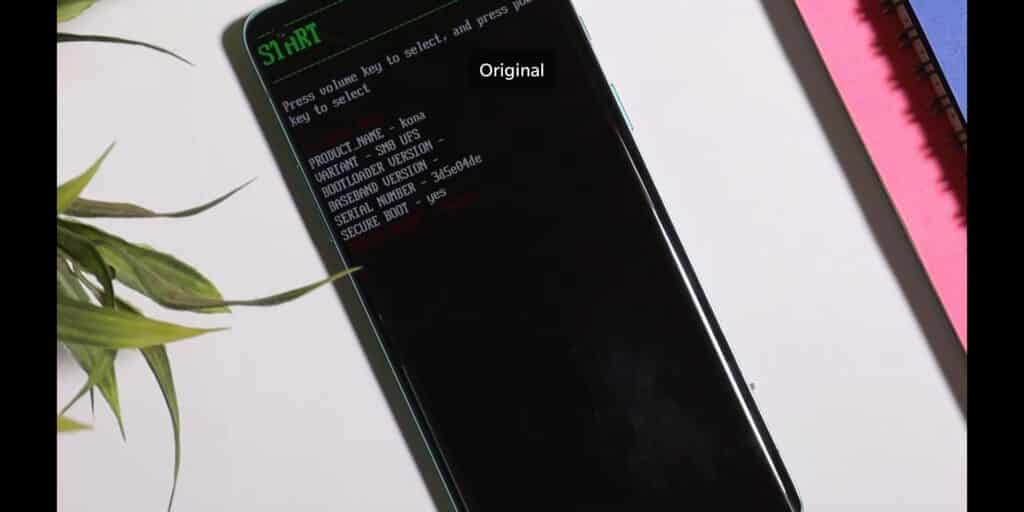
- Later on, type fastboot devices. If a serial number is shown then your device is properly connected. But if a serial number is showing, then you have to install adb and fastboot drivers properly.
Note: If your device is not detected in fastboot, then you have to update your fastboot drivers from the link given below:
Download Fastboot Drivers Zip: Telegram
- Then, type another command, Fastboot flashing unlocking.
- After typing fastboot flashing unlocking command, you have to Navigate with the volume buttons and Press accept to unlock the bootloader with the Power button.
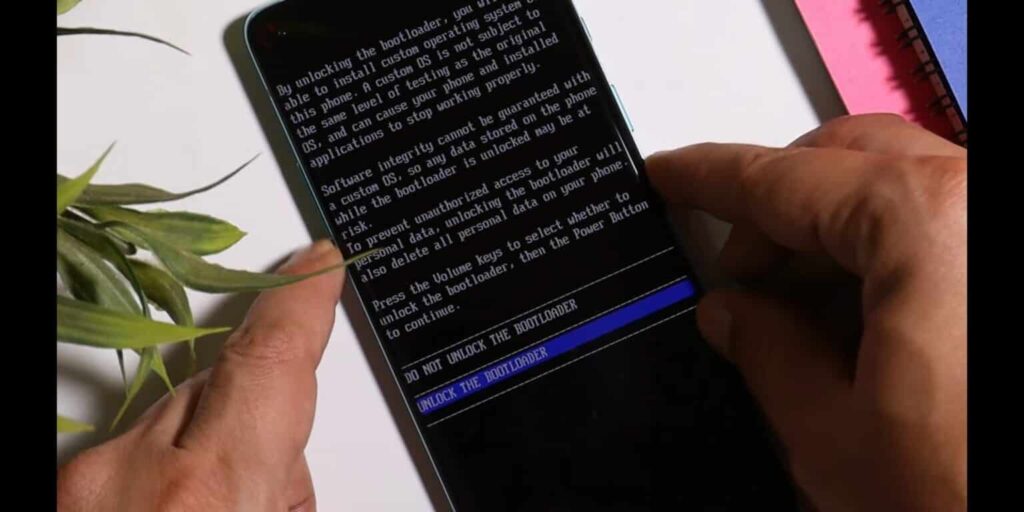
Note: If you unlock your bootloader, then all your data will be wiped. So, make sure to take the entire backup of your phone.
- After unlocking your phone, you have to flash custom recovery.
- So, again put your phone into fastboot/ bootloader mode.
- Then, in the Platform Tools folder, you have to open the terminal or command prompt by typing cmd in the Address Bar and hit enter.
- After that, you have to type a command in Command Prompt/ Terminal which is fastboot devices.
- Then, you have to type fastboot flash recovery (drag the recovery image file) and hit enter.
- Later on, type fastboot reboot recovery. After typing this command, your phone boots into OrangeFox Custom Recovery.
- Now, we have to sideload the Custom ROM file. So, for that, you have to click on the Menu toggle (last toggle) which is present on the bottom right.
- Then, tap on the ADB Sideload. After that, you have to type one last command by keeping the device connected to the PC which is adb sideload (drag the Custom ROM file), and hit enter.
Note: After flashing Custom ROM, you have to format user data. So, for that head to the Menu of the recovery. Then, Manage Partitions > Data > Format Data > type yes.
After that click on reboot system.
Then, you are good to go.
Note: Do keep in mind we (Team Techibee) are not responsible for any kind of bricked or damaged device. So, do it at your own risk.
If you guys facing any issues while installing crDroid custom ROM on your OnePlus 11, then do let us in the comment box or ask us on our Telegram group. Also, do let us know in the comment box, whether you like this post or not.
For More Such Updates Follow Us On – Telegram, Twitter, Google News, WhatsApp and Facebook

With its latest iOS 17, iPadOS 17.4, and macOS 17.4 (Sonoma), Apple has introduced 8 hand gestures during video calls in the FaceTime app and other video conferencing apps, which lets you fill your screen with 3D effects. For eg. if you make a heart by joining hands, then you will see that the floating red hearts will arise from the center of your hands as shown in the image below:
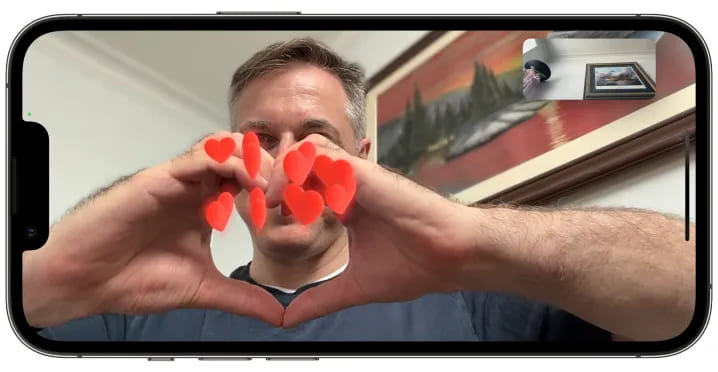
As most of the users don’t know that this feature is enabled by default. But sometimes, it creates awkward and embarrassing moments during some important video calls such as business meetings, online therapy, online classes, etc.
Luckily, Apple has come up with a solution for this. Along with the new iOS 17.4 (stable) and iPadOS 17.4 (stable), which is going to be launched by next month i.e. March 2024, Apple is going to release a new API (Application Programming Interface) that allows video conferencing apps to turn off the gesture-based reactions by default in their apps as said by MacRumors Contributor Aaron Perris. Until now, it’s not confirmed whether this API will also be accessible in macOS 14.4.
How to turn off Gesture-based Reactions (FaceTime)
1. On an iPhone or iPad:
- First, you have to open FaceTime on your iPhone or iPad.
- Then, swipe down from the top-right corner of the screen to see Control Center.
Note: If you have a Touch ID-based iPhone/ iPad, then Swipe up from the bottom to see Control Center.
- Then, you have to tap on the Effects button which is present in the top-left corner.
- After that, tap on the Reactions button.
- At last, swipe up twice (2 times) to return to FaceTime.
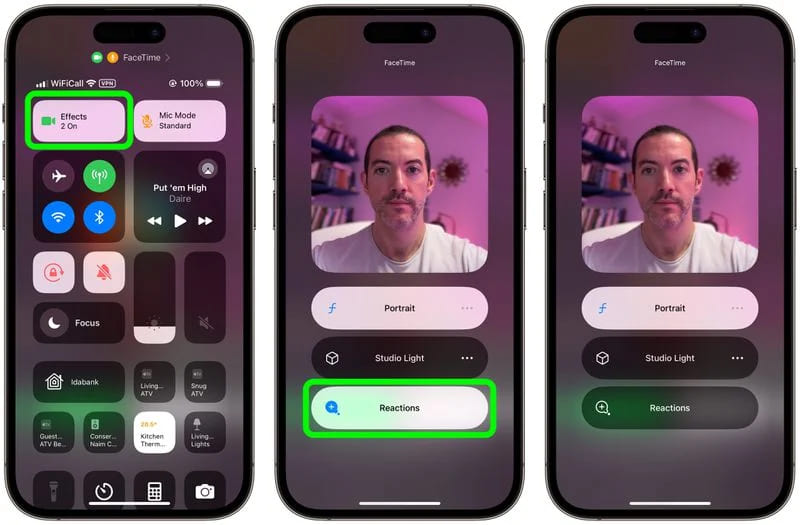
2. On a MacBook or iMac: To turn off FaceTime reactions on a MacBook or iMac, running macOS Sonoma, you have to click on the Reactions button which is present in the FaceTime menu bar.
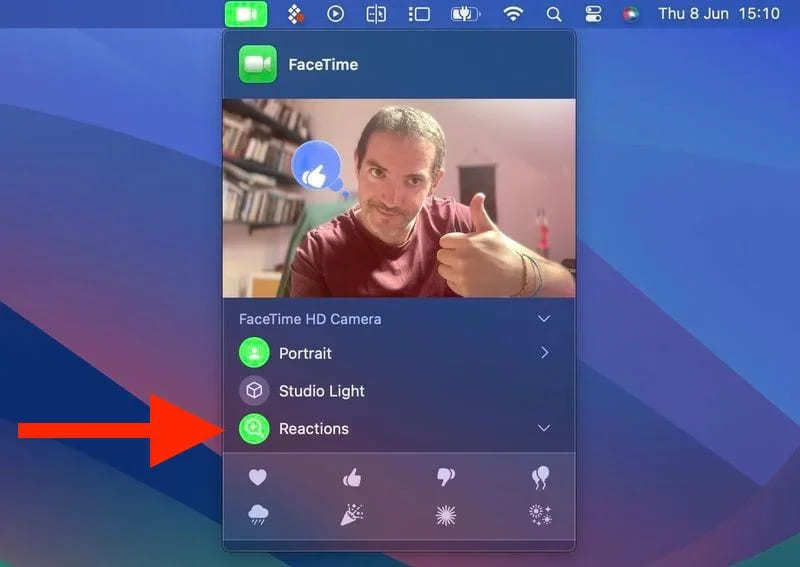
Do you already know guys, how to disable FaceTime reactions in iOS, iPadOS, iMac, and MacBook? Do let us know in the comment box. Also, do tell us whether you like this post or not.
Featured Image: TapSmart
For More Such Updates Follow Us On – Telegram, Twitter, Google News, WhatsApp and Facebook
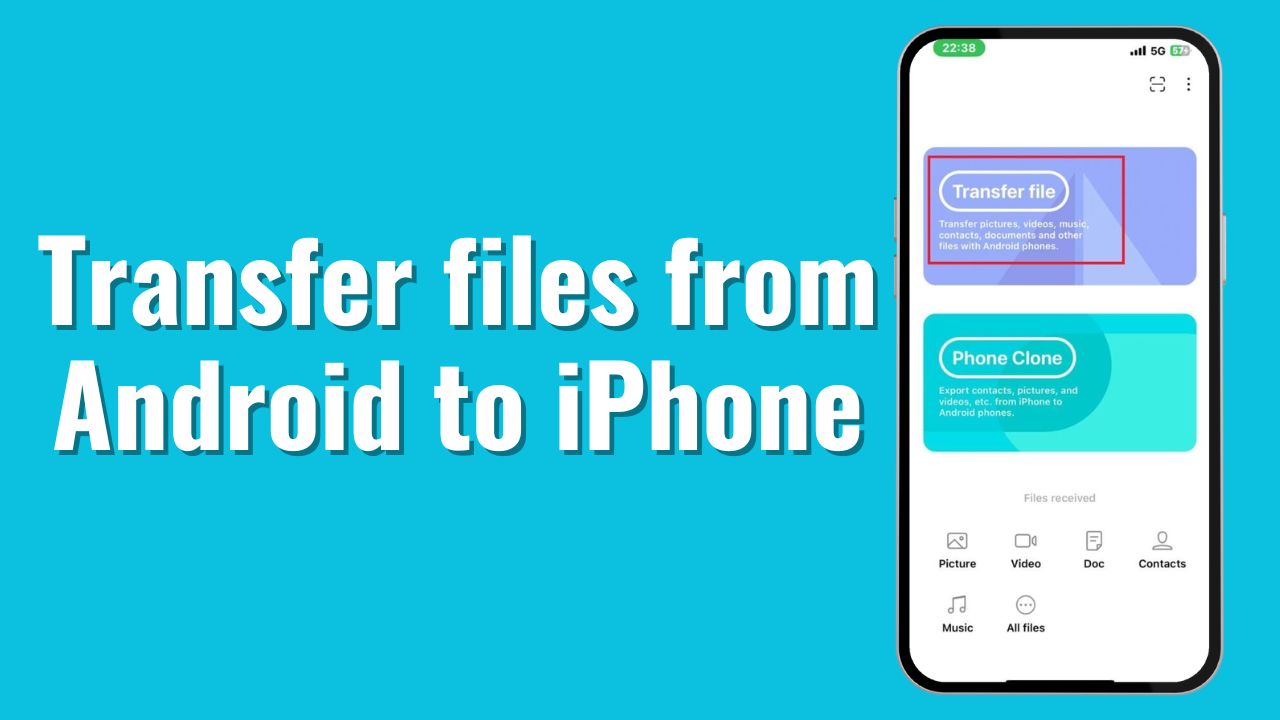
One of the major problems occurs when you are trying to share files between Android phones and Apple’s iPhones or vice versa. But in this post, I am going to solve that problem. So, if you want to share files between Android and iPhone, you are in the right place. Now, let’s move on to the process.
Note: The file size won’t be compressed. You will get the same size in the received phone as well.
How to share files between Android and iPhone?
If you want to share files between Android and iPhone, then you have to follow the steps that are listed below:
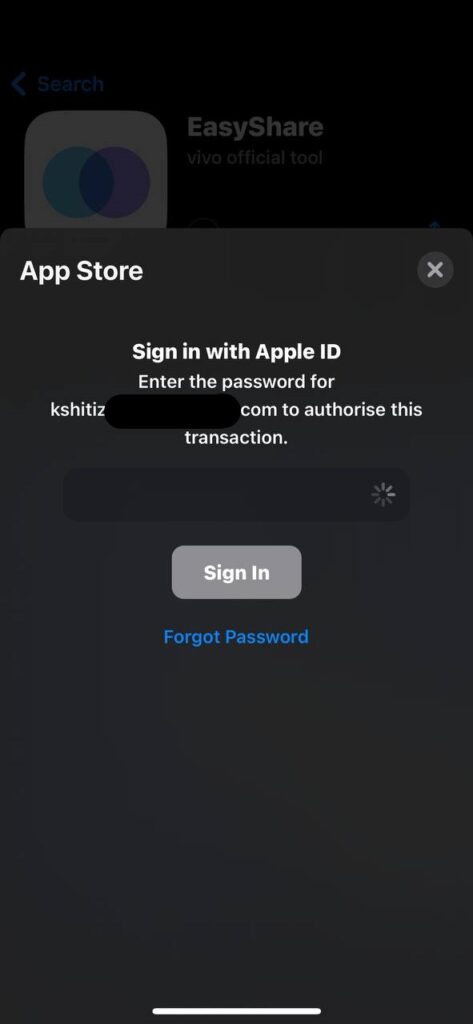
- First, you must download the EasyShare app from Google’s Play Store and Apple’s App Store.
- Later on, open the app and grant all the required permissions.
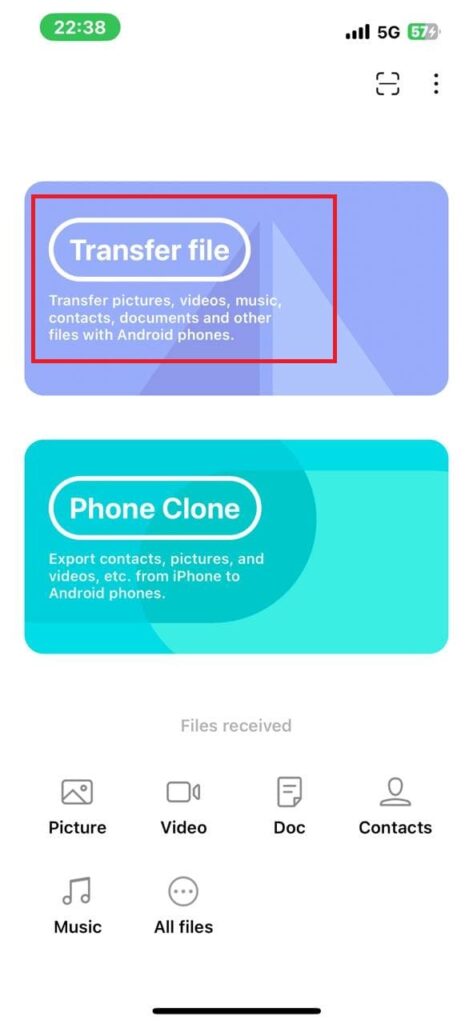
- Then, you have to click on Transfer File.
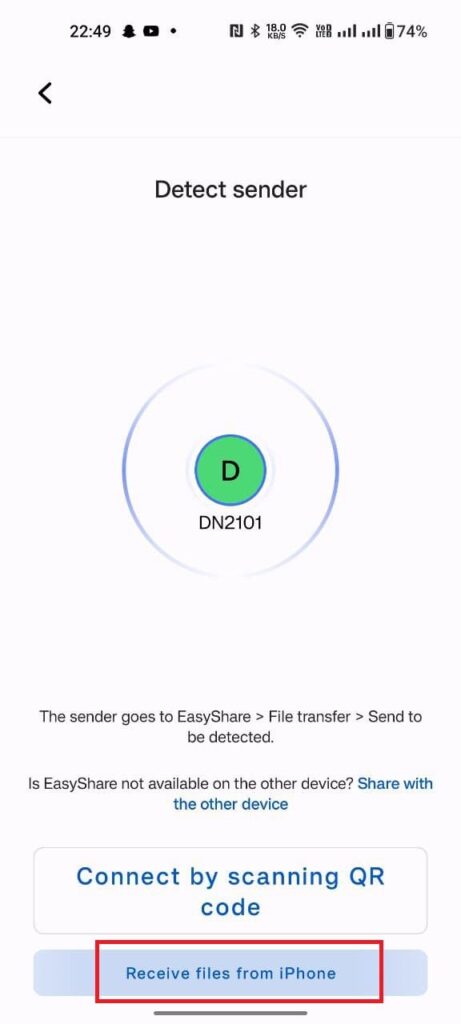
- After you click on Transfer File, you have to scan the QR Code on the other phone.
Note: Scan the code from your iPhone which is shown on your Android Phone.
To see the code, you have to tap the option which is shown in the image below:
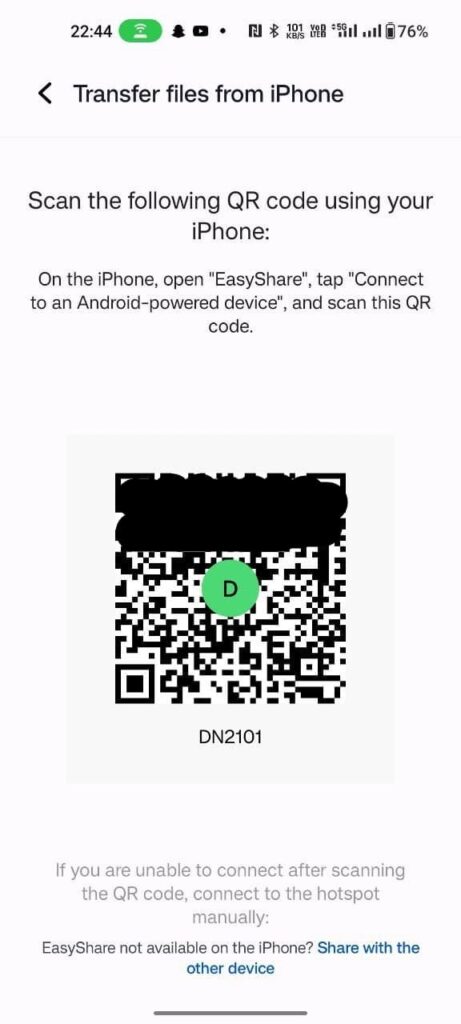
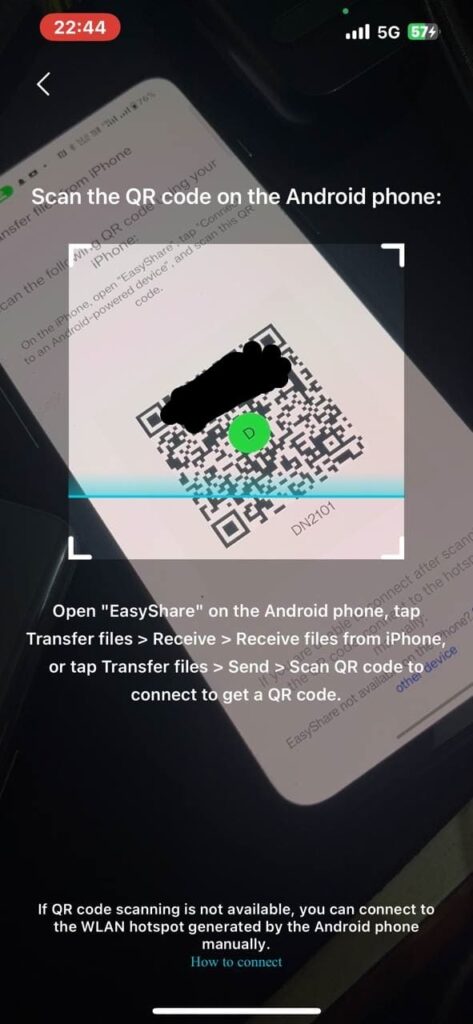
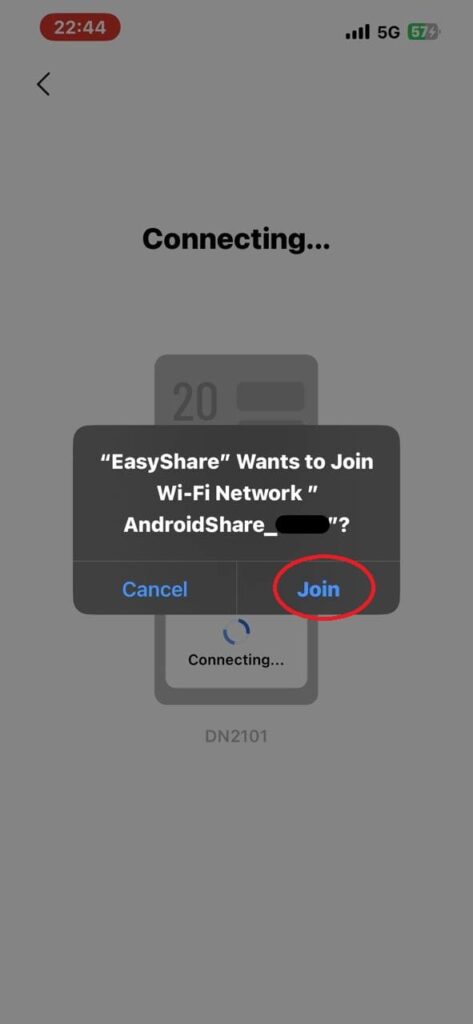
- Join the Network by clicking the Join button.
- Later on, you have to select the files that you want to send and click on the Send button present below the no. of the items, and items size.
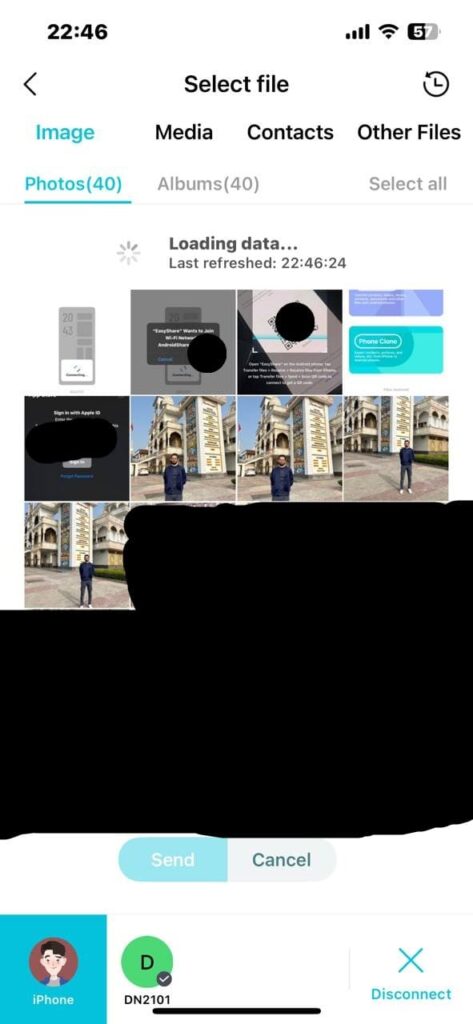
- The file was sent successfully.

After sending or receiving the files, if you wish to disconnect, then you have to follow the steps listed below:
- To disconnect, you have to press the back arrow, presented above the left side of the History.
- Then, click on the disconnect button which is presented in the bottom right corner.
- Now, click on Confirm.
Do you use this method before? If yes, then let us know in the comment box. Also do tell us whether you like this post or not.
For More Such Updates Follow Us On – Telegram, Twitter, Google News, WhatsApp and Facebook